Hide and Seek - Beluga Island
by LiminalRoar
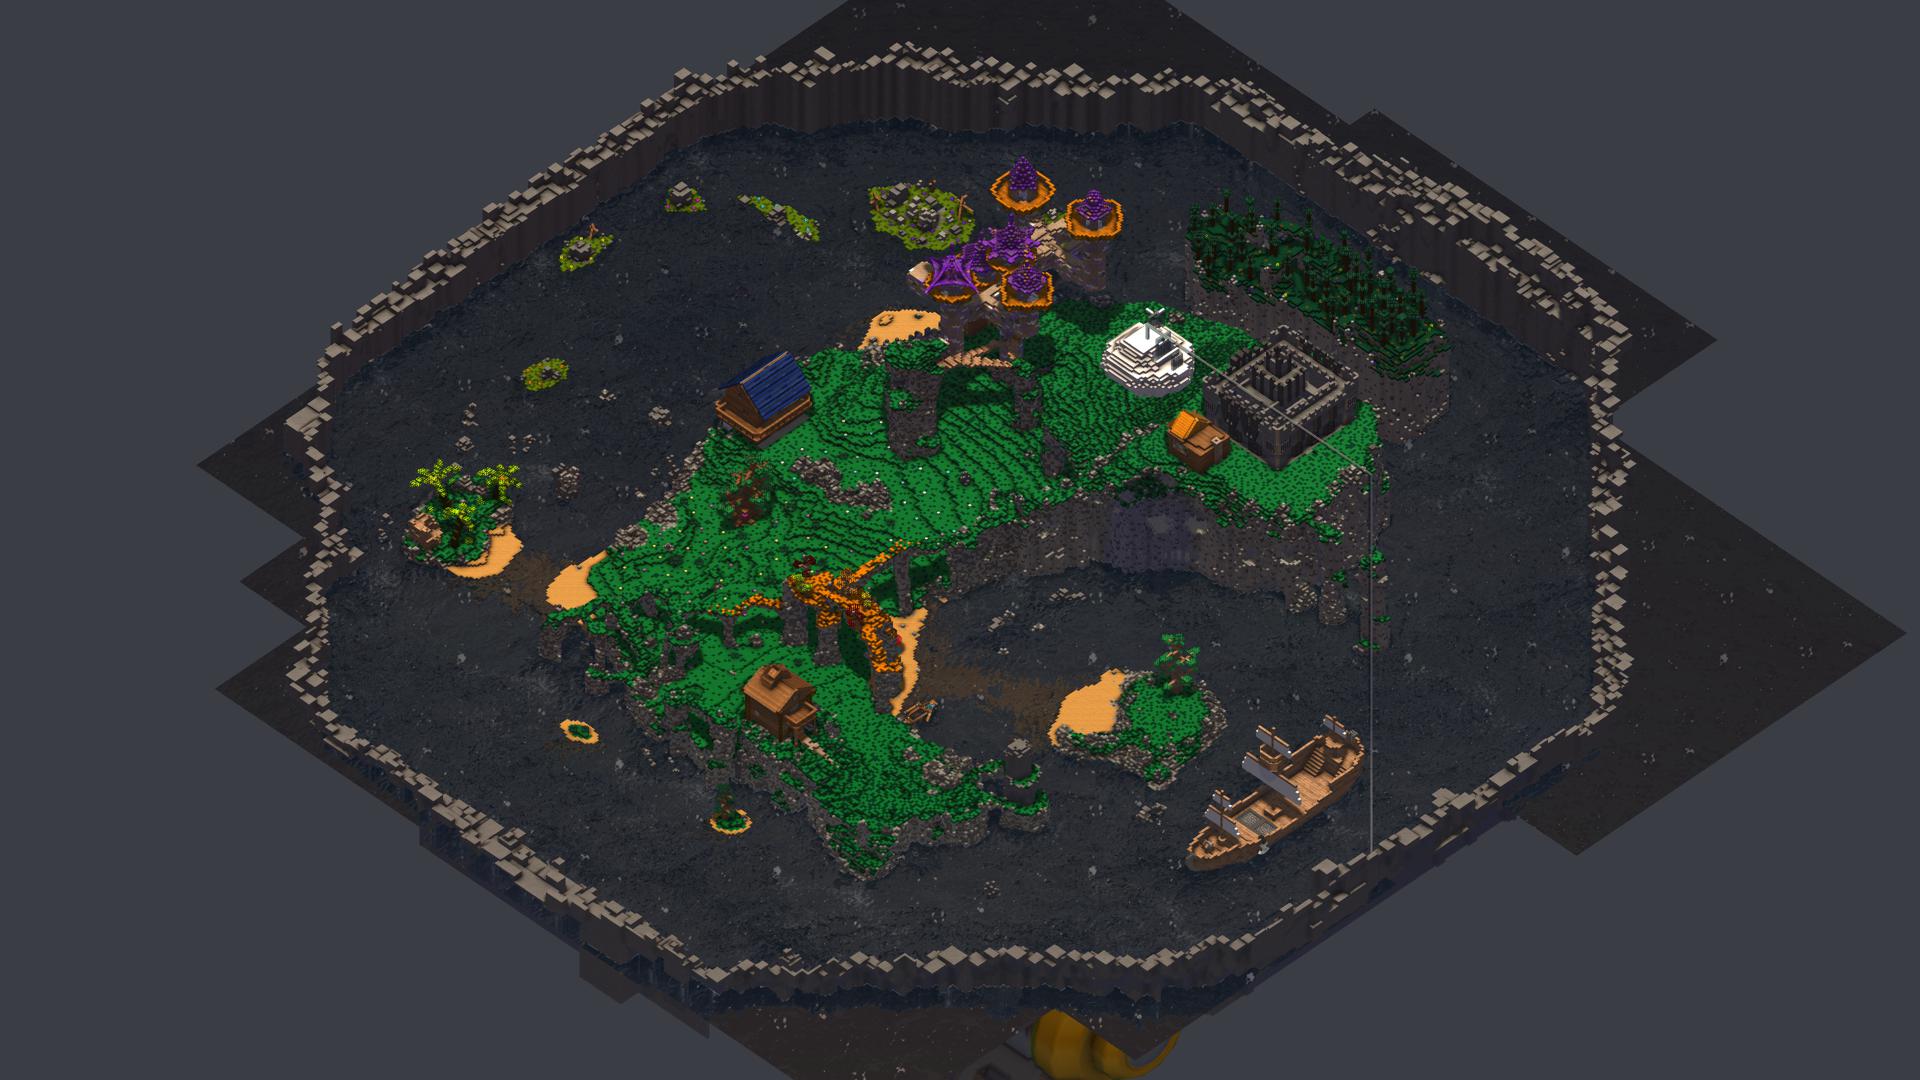
v1.8b Good luck comrades. Welcome A new handcrafted hide and seek map for Scrapman, Kan, Kosmo, Moonbo, and friends, and all other humans to enjoy! Beluga Island Drop into an expansive yet detailed world full of nooks and crannies of all variations. Get lost in the world and enjoy the sights, but don't go too deep. From coast to cavern, cove to castle, go covert and cackle as your companions crack from confusion. Features - Well over 100! 200! (ok too many to count, but there's over) 250 HIDING SPOTS! (likely pushing 300 if you include intended cubby holes and spots within spots) Drop in to the map from a mysteriously familiar cloud and find a direction and search. mostly likely you will find a spot or 3...or layers of spots... - 3 and 4 min timers. 4 minute recommended, but 3 is available as its a boring wait for seeker (sorry, the time budget went elsewhere) - CHALLENGE! Solve the secret of Skull Cave and escape the island! Good luck. NOT an easy challenge, as most of the master switches are very difficult to find (my record is 2:28) Rules - Destroy blocks, find cubby holes, use your wits, hide and seek YOUR way. - (OPTIONAL) What i call Green light, Yellow light, Red light, with a grace period for hiders to move with HUD off after seeking starts: - Green light (hiding time) - 3-4 minutes long. Total freedom of movement for hiders with HUD ON. - Yellow light (moving time) - 2+ minutes long. Hiders may move around and find a new spot if desired but must have HUD OFF until they finalize position. Any players that wish for yellow light must call out "yellow light" when seeking starts. - Red light (final phase) - When a hider is in their final hiding spot they call "red light", this could be immediately when seeking starts after green light phase is over, or when an announced personal yellow light phase is over. Player is then restricted to hiding within their spot or subsequent spots (with exceptions to come out of hiding briefly to observe play, etc, on danger of being found). More info 3rd map. Planned roughly after the last map, but i ended up taking a big break before beginning work on it this fall. Originally intended to be another no switches map, as its size affords plenty of hiding spots, but i ended up adding switch spots, and more switch spots, and more... This map has definitely been my most ambitious so far, intending to create an ultimate hide and seek level with content for many, many sessions. My first level was honestly a claustrophobic, inefficient mess and i made many mistakes on it. the second was a fun level, but still had some issues. This one, however, is larger than both, more complex, and took even longer (no idea on count, but over 200 hours for sure). I am happy with how it turned out and, again, think there is enough content here to allow for new discoveries for quite a while. Please let me know if you encounter any issues on the map, it is possible some things have been overlooked. Thanks for looking, i really hope you enjoy Beluga Island! Challenge switch hints. DONT READ IF YOU WANT TO TRY BLIND BUT YOU WILL PROBABLY NEED THESE. (for reference: north is side with the coral reef, south the pirate ship. also watch scrapman's video for various references here too). And the switch hints begin now: - 1. Center switch. EASY? Solved in video. Sensor puzzle. - 2. Northwestern switch. HARD. Hidden in the green archways above somewhere. Tricky, but not the hardest. Some hiding spots may have openings that swing up vertically and perhaps looking from on top of them could give a new perspective... - 3. South of Castle switch. VERY HARD. Accessed on the south cliff face. A previous hint may be useful here as well... - 4. Center north switch, shown by mines entrance towards the north. DRAMATICALLY CHALLENGING. It is deep in the mines, in the room with the death pits. It requires multiple hidden switches to find. It is relatively high up. 3+ switches to reach, first one is somewhere generally on the left side after you come down the stairs. - 5. Far east switch. INSANELY DIFFICULT. Near the center of the eastern island vertically and other directions. Not too far from where scrapman hid. Requires some very tricky switch locations to find.... Like finding a very hidden spot, searching the doorway for a more hidden switch, and paying close attention to new locations those switches opened up nearby... - 6. Southwestern switch. IMPOSSIBLE? Underground in caves. many routes lead here. may take between 4-10 switches to find it. If you find a network of caves underground south of the weird chapel house thing with lots of hallways that need switches to go between, you are close. Switches be hiding in the ground, walls, and ceiling here. Another tip is that some normal switches can be hidden quite well inside doorways that open from other switches, may be useful, especially for the harder challenge switches...GOOD LUCK!
Comments
0 total- No comments yet. Be first.